
The seed catalogs are filling my mailbox. I’m starting to make lists of vegetables to grow, paying particular attention to those that can be stored with the least amount of trouble and energy, including winter squash and root vegetables like beets.
Of course, I need lots of veggies like lettuces, green beans and tomatoes, too.
Many of the vegetables I plant get seeded right in the garden, but I usually buy a few flats of seedlings to get a head start on the harvest. Besides, it is so encouraging to see things growing all in one day. However, we received the gift of a huge piece of double glazed glass which we will use to make a cold frame. The availability of a cold frame has me thinking once more about starting more plants from seed myself.
Also, a friend told me about the success she had starting perennials from seed, which reminded me that I can at least start some herbs like basil, and annuals like zinnias and marigolds from seed.
Some of the seed catalogs sell all kinds of equipment including seed starting equipment. The list of things you can buy is really seductive, and it’s even worse when you go to our local garden centers and see the bags of seed starting mix right next to the seedling trays, the planting cells or planting flats, the acrylic domes to turn your array into a tiny greenhouse, heat mats and the peat pots and peat pellets. You might even find Cowpots made from recycled composted cow manure
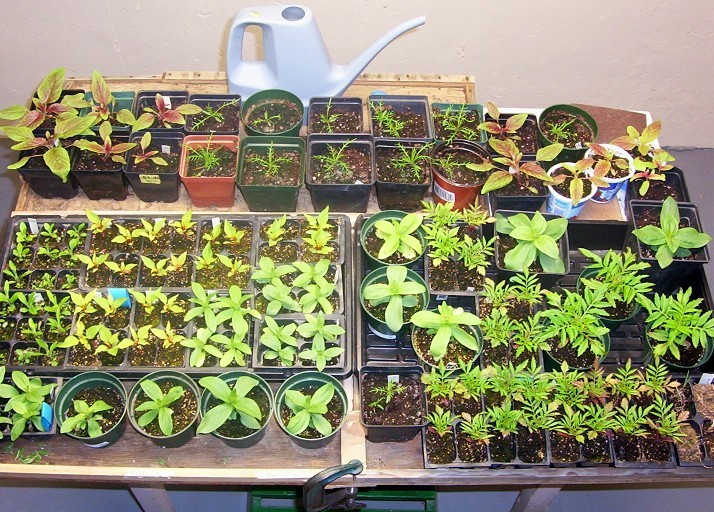
All of these supplies make it very easy to grow your own seedlings. You fill the flats or planting cells (the kind of thing you get when you buy seedlings) with damp planting mix and put these in the waterproof tray so you can keep the seeds appropriately damp by osmosis. You put water in the tray and it is absorbed through the drainage holes in the flats or cells.
If you are using flats you scatter a few seeds over the mix and cover them with the correct amount of seed mix. These seedlings will need to be transplanted into individual cells or pots when the true leaves appear.
If you are using the cell system put two or three seeds in each cell and cover with seed mix. You’ll be able to thin as they germinate.
The acrylic cover over your planted seeds will create a damp greenhouse environment.
If you use peat pots it is essential to keep them damp for good germination and growth.
While some of these supplies are very inexpensive and all can last for more than one year, none of them is necessary if you want to start your own seeds. You can use a whole variety of small plastic containers that once held butter, yogurt, berries, grape tomatoes or Chinese take-out. Some of these will even come with a clear plastic top, but you can easily use plastic wrap instead of a dome. I will say that the leakproof seedling trays help in corralling all the containers and provide an easy way to keep your seeds watered.
Seedling trays can go on the windowsill, but remember to keep turning them because the seedlings will lean towards the sun. Many people invest in a small set of grow lights which give more control over the time spent in the light every day.
I have had readers tell me how much more dependable their germination is when they use an electric heat mat. Germination depends more on the temperature of the soil than the ambient temperature. This would be a definite advantage in my house because my sunny windows are all in very cool rooms.
As tempting as the catalogs and seed starting displays are, patience is still required. Frost can be a danger into May depending on our own domestic micro-climates.
Different vegetables can be started at different times, usually between 4 and 8 weeks before the time you will want to plant them outdoors. Catalogs and seed packets will tell you the best time for setting out or planting directly in the soil. Some plants like lettuces and broccoli are cool weather crops and can go into the garden much earlier than warm weather crops like squash and tomatoes.
Perennials and annual flowers should be started in February and March.
No matter what the crop, seedlings will need to be hardened off before they are planted in the soil. Hardening off is the process of toughening the plant gradually to withstand full sun and breezes. This is done by reducing watering inside for a week and then bringing the flats of seedlings outdoors on a mild day, and placing them in a sheltered and shady spot for a few hours the first day.
The third day they can be left out longer, and the fifth day longer still. Bring the seedlings indoors at night. Hardening off is a gradual process; it is best not to rush it. In 7-10 days they are ready to be planted in the garden. Keep them watered!
I’ll be able to use my new (still to be built cold frame) for hardening off as well as for starting some cool climate crops in flats set out in the protective cold frame.
The snow is deep, but spring is slowly getting closer.
January 24, 2000
Hi Pat, this is a thorough tutorial on seed starting, thanks! I have used a heat mat and lights for the first time this year with good results. But they are not really necessary, as you say. That hardening off part can get you too, especially if you forget to bring them back in if the weather turns too cold again, a common problem here in TN. Lucky you with a to be built cold frame!
Frances
Pingback: Pages tagged "seed"
Pingback: How To Make Peat Pots | Provencialsofa
Pingback: Cow Pots | Tablerunner